Quick Answer
Start with Musashi’s katana, The Two Celestials and Charm of the Healer after Kiyomizu. After the first Oni Portal, unlock a second charm slot and develop Wind-Whipper for groups or Earth-Shakers for guarded enemies. After the third Portal, a third slot lets you combine Healer, Protection and Fencer’s Strength once their quests are complete. Switch to Awakening and Oni Power support when preparing an Oni-focused endgame build.
- Opening setup
- Two Celestials + Healer
- Second charm slot
- 2 Power Stones
- Charm Capacity 1, after the first Oni Portal
- Third charm slot
- 3 Power Stones
- Charm Capacity 2, after the third Oni Portal
Three builds you can work toward
The stages below use story and skill unlocks rather than character levels. Keep using the earlier setup until you have both the listed equipment and the required charm slots. None of these builds needs a paid costume or a cosmetic sword skin.
- Opening build and purchases
- Midstory build and purchases
- Late-story build and substitutions
- Endgame Boss Setup: the Oni Awakening build
| Stage | Armament and charms | Skills and equipment | Ready when… |
|---|---|---|---|
| 1 · Opening hours | The Two Celestials + Charm of the Healer. Use Wind-Whipper for groups once training awards it. | Deflect and Blazing State; first clothing and sword enhancements. | You have finished The Stage is Set at Kiyomizu and started The Oni’s Apprentice. |
| 2 · First and second Oni Portals | Wind-Whipper for groups; Earth-Shakers for guarded enemies. Healer + Fencer’s Strength after The Faceless. | Charm Capacity 1; improve the Armament you use. Keep all three equipment tracks current. | The first Portal is complete; collect Earth-Shakers from Underground Laboratory Level 4 before selecting it. |
| 3 · Third Portal to the finale | Healer + Protection + Fencer’s Strength for survival. Keep Two Celestials available; use Flashing Void for a distant punish after finding it. | Charm Capacity 2; finish useful defensive and weapon upgrades before the final mission. | The third Portal is complete and the relevant charm quests are finished. |
Stage 1: stay alive with Two Celestials and Healer
Open the suspended chest at Kiyomizu-dera after destroying the second Thread Genma to obtain The Two Celestials. Finish The Stage is Set at Kiyomizu for Charm of the Healer, then equip it through Equipment → Charms. Before that reward, use the same katana-and-Armament plan without requiring a charm.
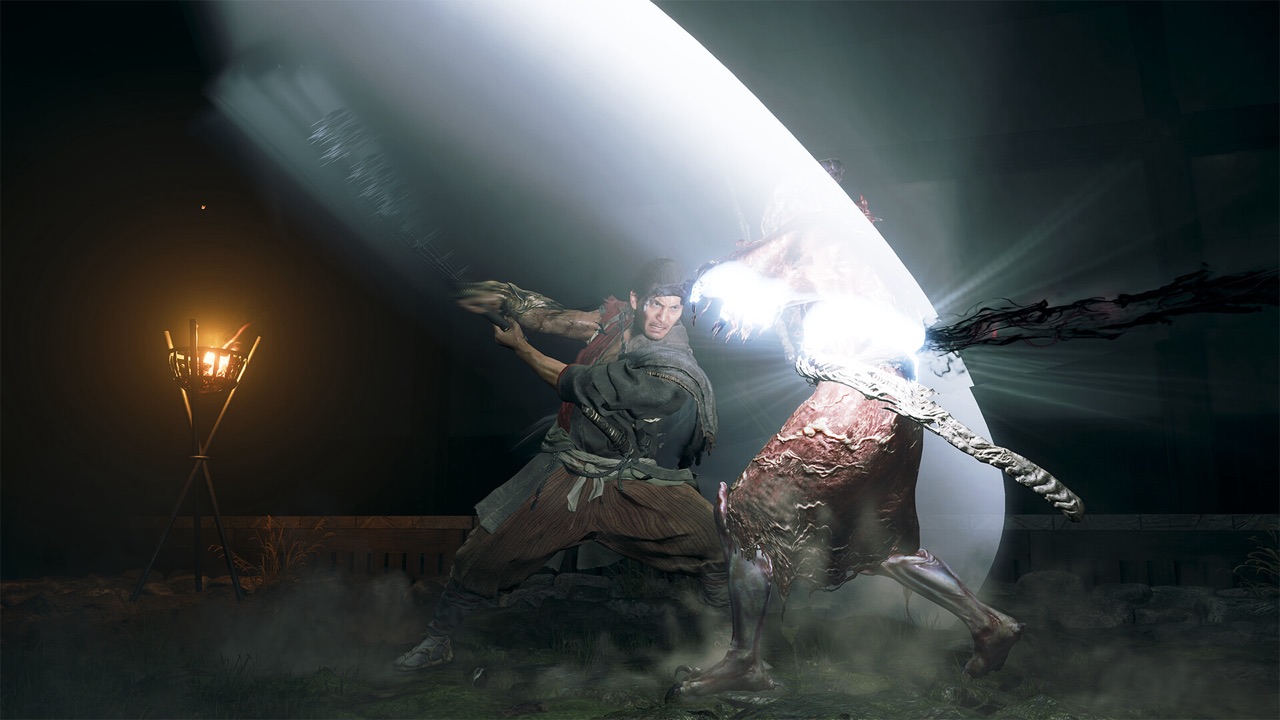
- Fight loop: defend against a familiar attack, land a short katana punish, then activate Two Celestials during a clear opening when you need healing. Absorb the Yellow Souls before returning to defense.
- When several enemies gather, switch to Wind-Whipper instead of trying to finish a long close-range combo in the middle of them.
- Easier approach: dodge attacks you have not learned and practise Deflect against one predictable strike. You can use the blades for healing without making every hit a perfectly timed combo. Delay Chain Issen until you can land Issen reliably.
| Part | Choose this | Cost or prerequisite |
|---|---|---|
| Armament | The Two Celestials; swap to Wind-Whipper when a group crowds you. | Two Celestials: Kiyomizu chest. Wind-Whipper: The Oni’s Apprentice training reward. |
| Charm | Charm of the Healer for more effective healing. | Complete The Stage is Set at Kiyomizu. Its Level 2 enhancement costs 3,000 Red Souls + 3,500 Favor. |
| Core skills | Follow the Deflect lesson, then learn Blazing State if you use parries. | 2 Power Stones each during The Oni’s Apprentice; 4 total for both. |
| Optional Armament skill | Two Celestials: Combo Strength. | 2 Oni Stones after collecting the blades. Practise its timing before buying later combo upgrades. |
| Equipment | Check clothing and sword together at the Spirit Mirror. | Initial clothing Level 2: 1 Hempen Cloth + 1 Cotton Cloth. Initial sword Level 2: 1 Whetstone + 1 Iron. |
Stage 2: add a second charm and a guard-breaking option
After the first Oni Portal, buy Charm Capacity 1. Keep Healer equipped and add Fencer’s Strength once you finish The Faceless, which becomes available after Okuni’s Kabuki Dance. If that quest is not available yet, keep Healer as the core of the build; the extra slot is not a reason to delay the main story.
- Fight loop: parry to build the Blaze Gauge, use Deflect to wear down enemy stamina, then take the Break Issen opening. When resources are low, the purple weak-point option releases souls to recover health and refill gauges.
- Spend the refilled Oni Power on Wind-Whipper when enemies bunch up. Against a guarded target, charge Earth-Shakers after a long recovery; do not begin charging while an attack is already coming toward you.
- Easier approach: keep Two Celestials as your healing option and use a quick Earth-Shakers attack when the full charge is unsafe. You give up some Break Damage in exchange for less time standing exposed.
| Part | Choose this | Cost or prerequisite |
|---|---|---|
| Two charm slots | Healer + Fencer’s Strength for healing and regular sword damage. | Charm Capacity 1: 2 Power Stones after the first Oni Portal. Fencer’s Strength: The Faceless reward. |
| Groups | Wind-Whipper with Power/Duration. | 2 Oni Stones after the first Oni Portal; Wind-Whipper must be collected. |
| Guards and enemy stamina | Earth-Shakers with Charge Level. | Pick up the chest after the Level 4 laboratory fan puzzle; Charge Level costs 2 Oni Stones after the first Portal. |
| Defensive skill | Deflection Power 1 when you regularly land Deflect. | 4,500 Red Souls after the first Oni Portal. |
| Equipment | Continue clothing and sword upgrades; inspect the gauntlet track as it opens. | Clothing uses cloth/leather/silk; sword uses whetstones/metal; gauntlet uses Genma materials such as Malicite. |
Stage 3: fill the third slot before the final mission
After the third Oni Portal, Charm Capacity 2 opens the third slot. For a first clear, use Healer + Protection + Fencer’s Strength once all three are available. Protection comes from The Night Parade after The Demon on the Mount. It is a late addition, not a requirement for the opening build.
- Fight loop: earn a safe opening with your usual defense, use the Armament that fits it, absorb the released souls, and return to defense. Once Oni Awakening is available and charged, use its attack window before finishing near the end of the gauge.
- Easier approach: retain Healer and Protection while learning a boss. Do not drop both for damage or gauge support if you are dying before you can use the extra resources.
- Before The Clash at Rendaino, keep a separate save and complete any missing charm quests or weapon pickups. The final Yoshitsune phase needs a specific Oni Awakening plan.
| Part | Default choice | When to change it |
|---|---|---|
| Charms | Healer + Protection + Fencer’s Strength. | For an Oni-focused boss plan, change to Awakening + Oni Power + Fencer’s Strength after obtaining those quest rewards. |
| Armament | Keep Two Celestials for healing; use Flashing Void to punish from farther away. | Use Earth-Shakers if enemy stamina is the obstacle; Wind-Whipper if the arena contains a group. |
| Skills | Charm Capacity 2: 3 Power Stones. Deflection Power 2: 6,500 Red Souls after the third Portal. | Only buy Deflection Power 2 if Deflect is part of your actual fight loop. |
| Equipment | Enhance clothing, sword and gauntlet with the materials available before the finale. | If you can survive but deal little damage, inspect sword and Armament upgrades; if a mistake ends the attempt, address clothing and defensive charms. |
Change one part when the default build is not working
Use these substitutions within the stage you have reached. They change how you handle an encounter without requiring a completely different character build.
| Problem | Change | Tradeoff |
|---|---|---|
| I keep missing Issen. | Use Deflect and short sword punishes; keep Healer equipped. | Slower than repeated successful Issen, but you do not depend on its tighter timing window. |
| I can dodge more reliably than parry. | Consider Reflex Combo: 2 Power Stones during The Oni’s Apprentice. | Dodge-based offense does not replace the need to parry or deflect attacks that specifically require it. |
| My boss openings are too short for Earth-Shakers. | Use a quick uncharged attack or try Flashing Void after finding it on Mount Oe. | The quick hammer hit deals less Break Damage; Flashing Void serves health damage more than stamina damage. |
| I die before the offensive charms help. | Keep Healer; add Protection when its quest becomes available. | You give up a damage or gauge effect for a better chance of surviving the next mistake. |
Choose one next purchase, not every skill at once
Power Stones, Oni Stones and Red Souls are separate budgets. The examples below are alternatives to compare at the relevant unlock, not a shopping list that must be completed before you can progress.
| Point in the story | Purchase | Reason to choose it |
|---|---|---|
| The Oni’s Apprentice | Deflect + Blazing State: 4 Power Stones combined. | You want to turn timed defense into stamina damage and stronger sword attacks. |
| Before the first Portal | Two Celestials: Combo Strength OR Oni Vision: Treasures; 2 Oni Stones each. | Choose the weapon skill for combat practice or the search skill to help find upgrade pickups. |
| After the first Portal | Charm Capacity 1: 2 Power Stones. | You have a second useful charm ready to equip. |
| After the first Portal | Wind-Whipper: Power/Duration OR Earth-Shakers: Charge Level; 2 Oni Stones each. | Improve the tool that addresses groups or enemy guards on your current route. |
| After the third Portal | Charm Capacity 2: 3 Power Stones. | You can complete the three-charm setup for the final stretch. |
Refill the combat gauges before spending them
Yellow Souls heal Musashi. Blue Souls fill Oni Power for the six gauge-powered Armaments. Once Oni Awakening is unlocked, Purple Souls build its transformation gauge. The Oni Bow is a separate ranged tool; do not treat it as another activation of the Armament gauge.
Parries help you reach Blazing State. Attacks in that state can release Blue Souls; Armament hits then help generate Purple Souls. Absorb during a safe opening instead of leaving the souls for an enemy to steal.
Learned skills and charm enhancements carry into New Game Plus; clothing, sword and gauntlet enhancement levels and Red Souls do not. Spend for your current build before starting a new run, and keep the pre-finale save separate.
If a build still feels weak, check what is missing
First confirm the charm is equipped, the extra slot is actually unlocked, and you own the Armament whose skill you bought. Then inspect the clothing, sword and gauntlet previews at the Spirit Mirror. A purchased skill and an equipment enhancement are different upgrades.
If the plan fails because you cannot finish the attack safely, use the easier alternative for that stage. More attack power will not fix spending the whole opening charging while the boss is already moving again.
Direct answers
Frequently asked questions
What is a good build for a first playthrough?
Start with The Two Celestials and Charm of the Healer. Add Wind-Whipper for groups, then Fencer’s Strength when its quest and your second charm slot are available. Late in the story, Healer + Protection + Fencer’s Strength is a practical survival setup.
When can I equip two or three charms?
Charm Capacity 1 opens after the first Oni Portal for 2 Power Stones. Charm Capacity 2 opens after the third Oni Portal for 3 Power Stones. Buy the capacity skills before trying to copy a multi-charm loadout.
What if I cannot land Issen reliably?
Build around Deflect, short sword punishes and healing instead. Blazing State rewards parries, while Reflex Combo supports dodge-based play. The appropriate defense still depends on the enemy attack.
Do I need to buy every recommended skill?
No. Pick the next upgrade for the weapon or defensive action you use. Power Stones, Oni Stones and Red Souls pay for different purchases, and later skills remain locked until their story requirements are met.
Is this the final-boss build?
This guide covers the route to a first clear. Endgame Boss Setup gives the full Awakening and Oni Power loadout, a default Armament, a repeatable gauge loop and the final Yoshitsune phase adjustment.